If you need to complete an action for multiple employees in the Payroll Center, it is easier to import a bulk employee file than to complete each action individually. These can be found in the Employees tab of the Payroll Center.
There are 3 options for bulk imports:
- Import new employees
- Import employee changes
- Import employee departures
 |
Adding multiple employees
If you are adding multiple employees it is update these in bulk through a CSV upload.
- Navigate to the Employees tab
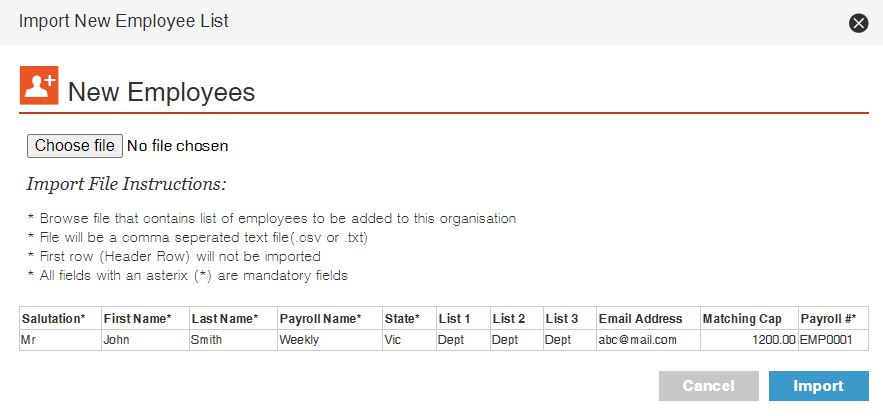
- Click on Import New Employees List
- Create a CSV with the same column headings as those shown on your screen
- Click Choose file
- Locate the CSV you just created on your PC and upload it
- Click Import to begin the process of moving your employee data into the platform
 |
If the import file has under 500 records, the data in the uploaded file will first be validated with an on-screen import summary displayed to you. Only the records in the Employees ready to import section will be imported.
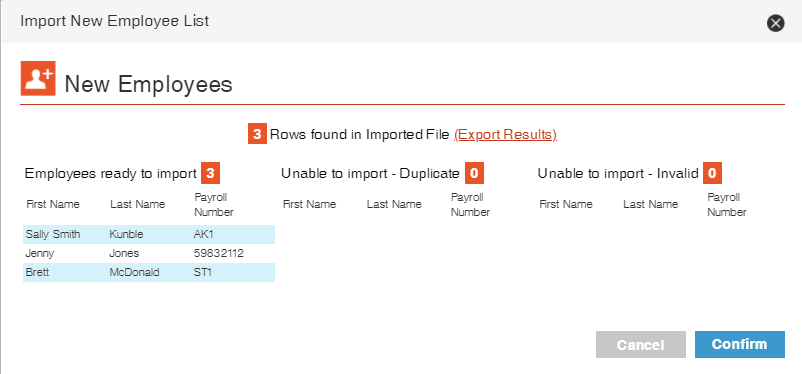 |
Any employees in the Unable to import section will need to be reviewed in the uploaded file. This can be done by clicking on the 'Export Results' link. This will export a file which gives a summary/status against every employee record in that file and correct the data in the import file where necessary. Once review is complete, attempt another import until all records are in the Employees ready to import section.
Only when all records are in the Employees ready to import section should you click Confirm.
Once the file has been imported, all new employees will appear in the All employees list in the Employees tab.
If the import file has 500 or more records, then the file will be added to a queue and will be validated in a background process. The user will be presented with the following interim screen.
 |
Clicking on the 'Check Status' button will take the user to the 'Import History' page.
The import file will be validated first to check for errors. Once the import file is 'Validated', it is now ready for import. The user can export the file and review the results, can 'cancel' the import altogether or 'confirm' the import. The Confirm button should only be clicked when all records appear in the Ready to import category. This will perform the actual import.
 |
Once the import is complete, the 'Cancel' and 'Confirm' button will disappear. The results file from processing this import can be downloaded anytime by clicking on the 'Export Results' button. The results files provide the ability to review past import files at anytime.
 |
Edit multiple employees
To edit multiple employees details at once, such as the following information:
- Their payroll cycle or business unit
- Any profile details
- Employee Suspended or Live status.
Follow these steps:
- Within the Payroll Portal, navigate to the Employees tab
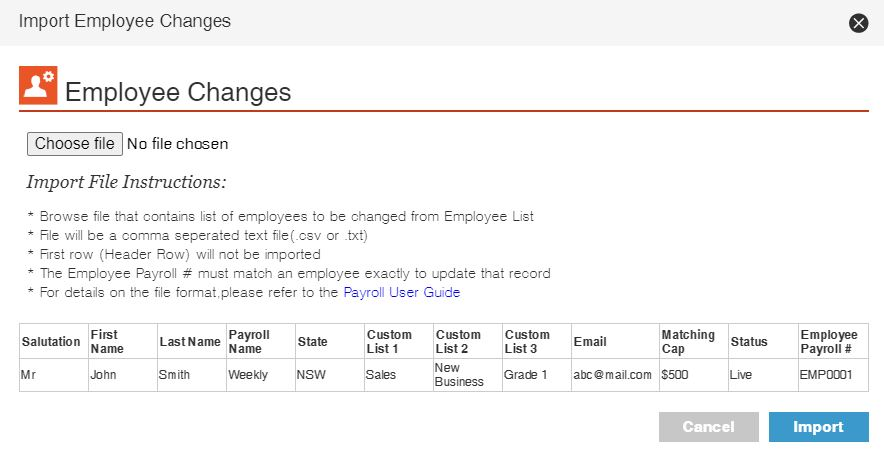
- Click the Import Employee Changes button
- Create a CSV with the same column headings as those shown on your screen
- Click Choose file
- Locate the CSV you just created on your PC and upload it
- Click Import
If the import file has over 500 records, then the same steps, logic and user experience for adding multiple employees will apply.
If the import file has under 500 records, the data in the uploaded file will first be validated and an on-screen import summary will be displayed to you. Only the records in the Employees to be changed section will be imported.
Any employees in the Unable to import section will need to be reviewed in the uploaded file. Once review is complete attempt another import until all records are in the Employees to be changed section.
Only when all records are in the Employees to be changed section should you click Confirm.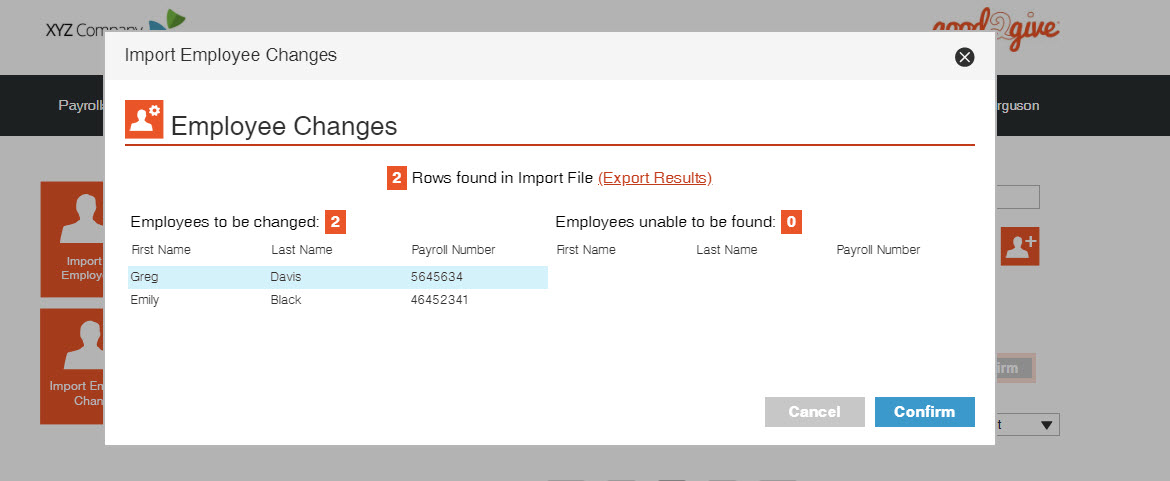
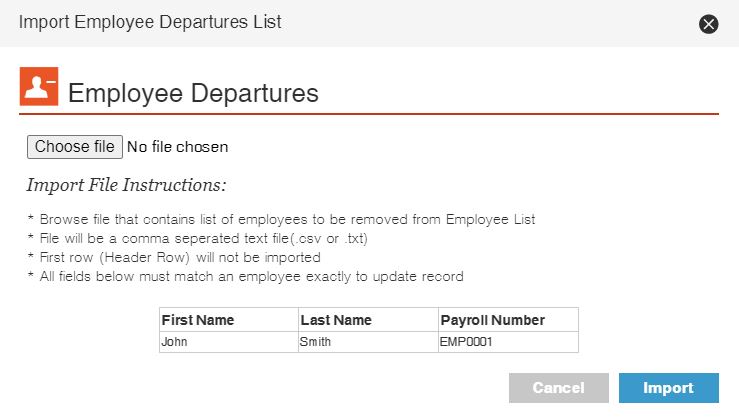
Terminate multiple employees
To terminate several employees, follow these steps:
- Within the Payroll Portal, navigate to the Employees tab
- Click the Import Employee Departures List button
- Create a CSV with the same column headings as those shown on your screen
- Click Choose file
- Locate the CSV you just created on your PC and upload it
- Click Import to begin the process of moving your employee data into the platform. [Note: An employees in the file are terminated as soon as the import of the file has been completed.]
 |
All import files
- Must be in a CSV file format
- Should just have the employee records that need to be added or modified.
- The field position and format defined by Good2Give must be followed to ensure accurate importing.
- All the 'results' (summary) files that are generated for each import are displayed in the 'Import History' page ordered by date last imported descending like an audit.
- You only need to have data in the fields that need to be changed (for the changes files). All other fields (that are not changing) for that employee record can be left blank. The data from the changes file will overwrite all current data for those employee records stored in the Good2Give Workplace Giving platform.